2020. 8. 3. 23:34ㆍBack-end/Python
서론
최근에 깃허브를 둘러보다가 Javascript를 공부하면서 Express.js와 Socket.io로 구현했던 간단한 채팅 예제를 발견했다. 예전과 비교해서 얼마나 레벨업이 되었는지 확인할겸 새로운 채팅 앱을 만들어보려고 한다. 다만, 이번에는 웹 어플리케이션 서버를 Express.js 대신 Python의 Flask를 사용할 계획이다.
1. 프로젝트 구성
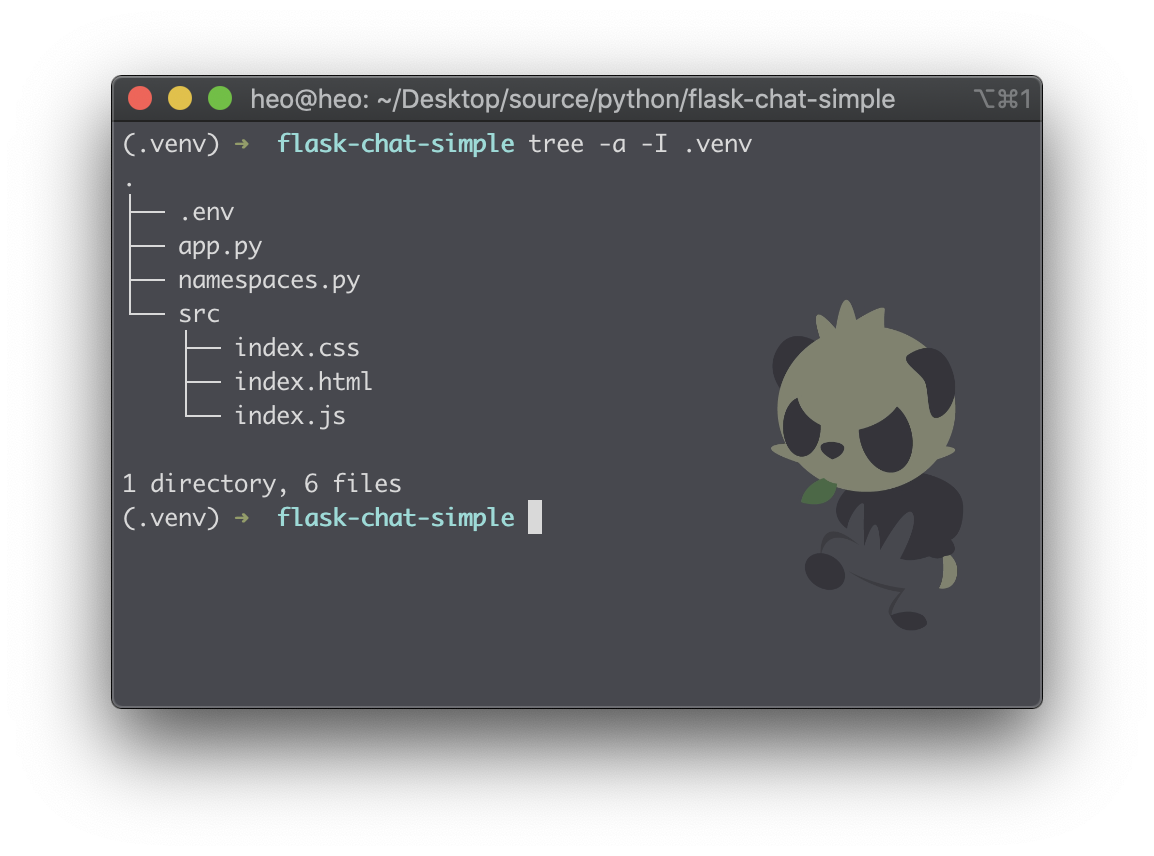
1-1. 프로젝트 폴더 생성
|
1
2
3
|
mkdir flask-chat-simple
cd flask-chat-simple
|
cs |
1-2. 파일 생성
|
1
2
3
4
5
6
7
8
9
10
11
12
13
14
15
16
17
18
|
### For Windows
# Environment Variables File
type NUL > .env
# Web Application File
type NUL > app.py
# Socket Namespaces File
type NUL > namespaces.py
# Client Directory
mkdir src
# Client Files
type NUL > src/index.html
type NUL > src/index.css
type NUL > src/index.js
|
cs |
|
1
2
3
4
5
6
7
8
9
10
11
12
13
14
15
16
17
18
|
### For Linux/OSX
# Environment Variables File
touch .env
# Web Application File
touch app.py
# Socket Namespaces File
touch namespaces.py
# Client Directory
mkdir src
# Client Files
touch src/index.html
touch src/index.css
touch src/index.js
|
cs |
1-3. 가상환경 생성
|
1
2
3
4
5
6
7
8
9
|
# Create virtual ENV.
virtualenv .venv
# Activate virtual ENV.
### for Windows
".venv/Scripts/activate"
### for Linux/OSX
. .venv/bin/activate
|
cs |
1-4. 라이브러리 설치
|
1
|
pip install flask python-socketio python-dotenv
|
cs |
2. 환경변수 설정
flask-chat-simple/.env
|
1
2
|
FLASK_MODE=development
FLASK_DEBUG=1
|
cs |
3. Server: Flask Application 생성
flask-chat-simple/app.py
|
1
2
3
4
5
6
7
8
9
10
11
12
13
14
15
16
17
18
19
20
21
22
23
24
25
26
27
28
29
30
31
32
33
34
35
36
37
38
39
40
41
42
43
44
45
46
47
48
49
50
51
52
|
import os
import dotenv
from flask import Flask, url_for, render_template
from socketio import Server, WSGIApp
from namespaces import ChatNamespace
# Set Constant Variables
ROOT_PATH = os.path.dirname(os.path.abspath(__file__))
STATIC_FOLDER = os.path.join(ROOT_PATH, "src")
TEMPLATE_FOLDER = STATIC_FOLDER
# Create Flask Application
app = Flask(
__name__,
static_url_path="/static/",
static_folder=STATIC_FOLDER,
template_folder=TEMPLATE_FOLDER
)
# For reload changed static file.
def dated_url_for(endpoint, **values):
if endpoint == 'static':
filename = values.get('filename', None)
if filename:
file_path = os.path.join(app.static_folder, filename)
values['q'] = int(os.stat(file_path).st_mtime)
return url_for(endpoint, **values)
@app.context_processor
def override_url_for():
return dict(url_for=dated_url_for)
@app.route('/', methods=["GET", "POST"])
def index():
return render_template("index.html")
# Create SocketIO Server
sio = Server(
async_mode="threading",
logger=app.logger,
engineio_logger=app.logger
)
sio.register_namespace(ChatNamespace(sio, '/chat'))
# Set SocketIO WSGI Application
app.wsgi_app = WSGIApp(sio, app.wsgi_app)
if __name__ == "__main__":
dotenv.load_dotenv(dotenv_path=".env")
app.run(host="localhost", port=3000, threaded=True)
|
cs |
1. [ 22-32 ln ] - Static 파일 Reload 설정.
- 정적 파일은 내용이 수정되어도 Server를 재실행하지 않으면 반영되지 않음.
- 따라서, 정적 파일을 요청할 때마다 파일의 수정일자를 QueryString으로 붙여서 다시 load되도록 설정.
2. [ 39-43 ln ] - Socketio Server 객체 생성.
- [ 40 ln ] - async_mode는 engineio.Server 설정 옵션으로 비동기 처리를 위한 모드 옵션. eventlet이 기본설정이며, gevent, gevent_uwsgi, threading을 사용할 수 있음. 예제에서는 간단하게 사용가능한 threading을 적용.
3. [ 44 ln ] - Socketio Server Namespace 설정.
- Namespace를 설정하는 방법은 크게 두가지가 있음.
- 첫째, 데코레이터를 사용하는 방법, @sio.on("이벤트명", namespace="/chat")
- 둘째, socketio.Namespace 클래스를 생성하는 방법.
- 첫번째 방법을 사용하는게 편하긴하지만 객체지향적으로 작성하는 편이 좀 더 깔끔하기 때문에 예제에서는 두번째 방법을 사용.
4. [ 47 ln ] - Socket Server를 WSGI로 변환.
- Flask, Django로 구현된 WSGI와 통합할 수도 있음.
- 이번예제에서는 Flask를 사용하므로, Flask WSGI와 Socket Server를 통합.
5. [ 52 ln ] - threaded 옵션 설정.
- async_mode="threading"을 사용하려면, 서버가 Thread를 처리할 수 있어야 하므로 Threaded 옵션 설정.
4. Server: Socket Namespace 생성
flask-chat-simple/namespaces.py
|
1
2
3
4
5
6
7
8
9
10
11
12
13
14
15
16
17
18
19
20
21
22
23
24
|
from socketio import Namespace
from urllib.parse import urlsplit, parse_qsl
class ChatNamespace(Namespace):
def __init__(self, sio, namespace, *args, **kwargs):
super(Namespace, self).__init__(namespace)
self.sio = sio
self.logger = sio.logger
def on_connect(self, sid, env):
params = dict(parse_qsl(urlsplit(env["QUERY_STRING"]).path))
self.sio.logger.info(f'{ sid } [SOCKET][CONNECT]')
self.sio.logger.info(f'{ sid } [SOCKET][CONNECT][PARAMS] { params }')
def on_message(self, sid, data):
self.sio.logger.info(f'{ sid } [SOCKET][MESSAGE] { data }')
self.emit("receive_message", data)
def on_disconnect(self, sid):
self.sio.logger.info(f'{ sid } [SOCKET][DISCONNECT]')
|
cs |
1. [ 5~9 ln ] - ChatNamespace 생성자 설정.
- socketio.Namespace 클래스는 첫번째 인자로 namespace path를 받는데, sio(socketio.Server)객체를 받을 수 있도록 확장.
- sio는 session을 처리할 때, 필요한데 이번 예제에서는 다루지 않음.
2. [ 11-15 ln ] - "connect" Event를 처리하는 Event Handler.
- Socket Server에 접속하면 내부적으로 "connect" Event를 발생시키는데, 이를 Server와 Client에 정의된 "connect" Event Handler를 통해 Event을 받아서 처리함.
- [ 12 ln ] - Socket Client에서 데이터와 함께 접속을 시도하려면 URI에 QueryString으로 데이터를 붙여야함.
예) io("http://localhost:3000/chat?username=dochi")
3. [ 17-20 ln ] - "message" emit Event를 처리하는 Event Handler.
- Client로부터 "message" Events를 받아서 Namespace에 접속한 모든 Client에게 "receive_message" Event를 보냄.
4. [ 22-23 ln ] - "disconnect" Event를 처리하는 Event Handler.
5. Client: HTML 생성
flask-chat-simple/src/index.html
|
1
2
3
4
5
6
7
8
9
10
11
12
13
14
15
16
17
18
19
20
21
22
23
24
25
26
27
28
|
html<!DOCTYPE html>
<html lang="ko">
<head>
<meta charset="utf-8">
<meta name="viewport" content="width=device-width, initial-scale=1">
<title>Socket App</title>
<link href="{{ url_for('static', filename='index.css') }}" rel="stylesheet">
<script src="https://unpkg.com/babel-standalone@6.26.0/babel.js"></script>
<script src="https://cdnjs.cloudflare.com/ajax/libs/babel-polyfill/7.10.4/polyfill.min.js"></script>
<script src="https://cdnjs.cloudflare.com/ajax/libs/socket.io/2.2.0/socket.io.js" integrity="sha256-yr4fRk/GU1ehYJPAs8P4JlTgu0Hdsp4ZKrx8bDEDC3I=" crossorigin="anonymous"></script>
</head>
<body>
<div id="root">
<div class="chat-container">
<div class="scroll-wrapper">
<ul class="chat-msg-list"></ul>
</div>
<div class="chat-msg-controller">
<form id="message_form">
<input type="text" name="message" placeholder="message">
<button type="submit">send</button>
</form>
</div>
</div>
</div>
<script src="{{ url_for('static', filename='index.js') }}"></script>
</body>
</html>
|
cs |
1. [ 7, 26 ln ] - Flask의 탬플릿인 Jinja2의 문법.
2. [ 8-10 ln ] - CDN 설정.
- [ 8-9 ln ] - 최신 Javascript 문법을 사용하기위한 Babel CDN 설정.
- [ [ 10 ln ] - Socket.io CDN 설정.
3 [ 13~25 ln ] - 채팅을 위한 Element 설정.
6. Client: Socket Client 생성
flask-chat-simple/src/index.js
|
1
2
3
4
5
6
7
8
9
10
11
12
13
14
15
16
17
18
19
20
21
22
23
24
25
26
27
28
29
30
31
32
33
34
35
36
37
38
39
40
41
42
43
44
45
46
47
48
49
50
51
52
|
// Create Socket Instance
const socket = io("http://localhost:3000/chat?username=Dochi");
// On Event, Wait for 'connect' emit.
socket.on("connect", ()=>{
console.log("[connect]");
});
// On Event, Wait for 'disconnect' emit.
socket.on("disconnect", ()=>{
console.log("[disconnect]");
});
// On Event, Wait for 'receive_message' emit.
socket.on("receive_message", ({ username, message })=>{
const text = [username, message].join(":");
const div_wrapper = document.querySelector(".chat-container > .scroll-wrapper");
const ul_msg_list = div_wrapper.querySelector(".chat-msg-list");
const li_msg_item = ul_msg_list.appendChild(document.createElement("li"));
li_msg_item.appendChild(document.createTextNode(text));
document.querySelector(".scroll-wrapper").scrollTop = div_wrapper.scrollHeight;
});
// Emit Event, Emit message data.
const send_message = ( data )=>{
socket.emit("message", data);
}
// Find Message Form Element
const message_form = document.getElementById("message_form");
// Send Message Handler
const handle_send_message = ( event )=>{
event.preventDefault();
// Get Input Message
const input_message = event.target.querySelector('input[name="message"]');
const text_message = input_message.value;
// Send Message Data
send_message({
username: "Dochi",
message: text_message
});
// Initialize
input_message.value = "";
}
message_form.addEventListener("submit", handle_send_message, false);
|
cs |
1. [ 2 ln ] - Socket Client 객체 생성.
- usage: io( URI, [options] )
- 자세한 설정 옵션은 socket.io 공식 문서를 참조.
2. [ 5-25 ln ] - Event Handler 설정.
- connect, disconnect는 접속, 접속해제시 발생되는 Event를 처리.
- [ 15-25 ln ] - message 데이터를 받아서 Element를 생성하고 화면에 렌더링하는 Event Handler.
3. [ 28-30 ln ] - Event Emitter 설정.
- Socket Server로 "message" Event를 보내는 Emitter.
4. [ 33-52 ln ] - Form에 입력된 message를 처리하는 로직.
- 입력된 message를 Emitter로 Server에 전송.
7. Client: CSS 생성
flask-chat-simple/src/index.css
|
1
2
3
4
5
6
7
8
9
10
11
12
13
14
15
16
17
18
19
20
21
22
23
24
25
26
27
28
29
30
31
32
|
html, body {
padding: 0;
margin: 0;
height: 100%;
width: 100%
}
.chat-container {
position: relative;
height: 350px;
padding: 2px;
}
.scroll-wrapper {
position: relative;
height: 100%;
box-sizing: border-box;
border: 1px solid darkgrey;
overflow-y: scroll;
}
.chat-msg-list {
position: absolute;
bottom: 0;
margin: 0;
list-style: none;
padding: 1px;
width: 100%;
max-height: 100%;
box-sizing: border-box;
}
.chat-msg-item {
padding: 3px 3px;
overflow-wrap: break-word;
}
|
cs |
8. 실행
python app.py
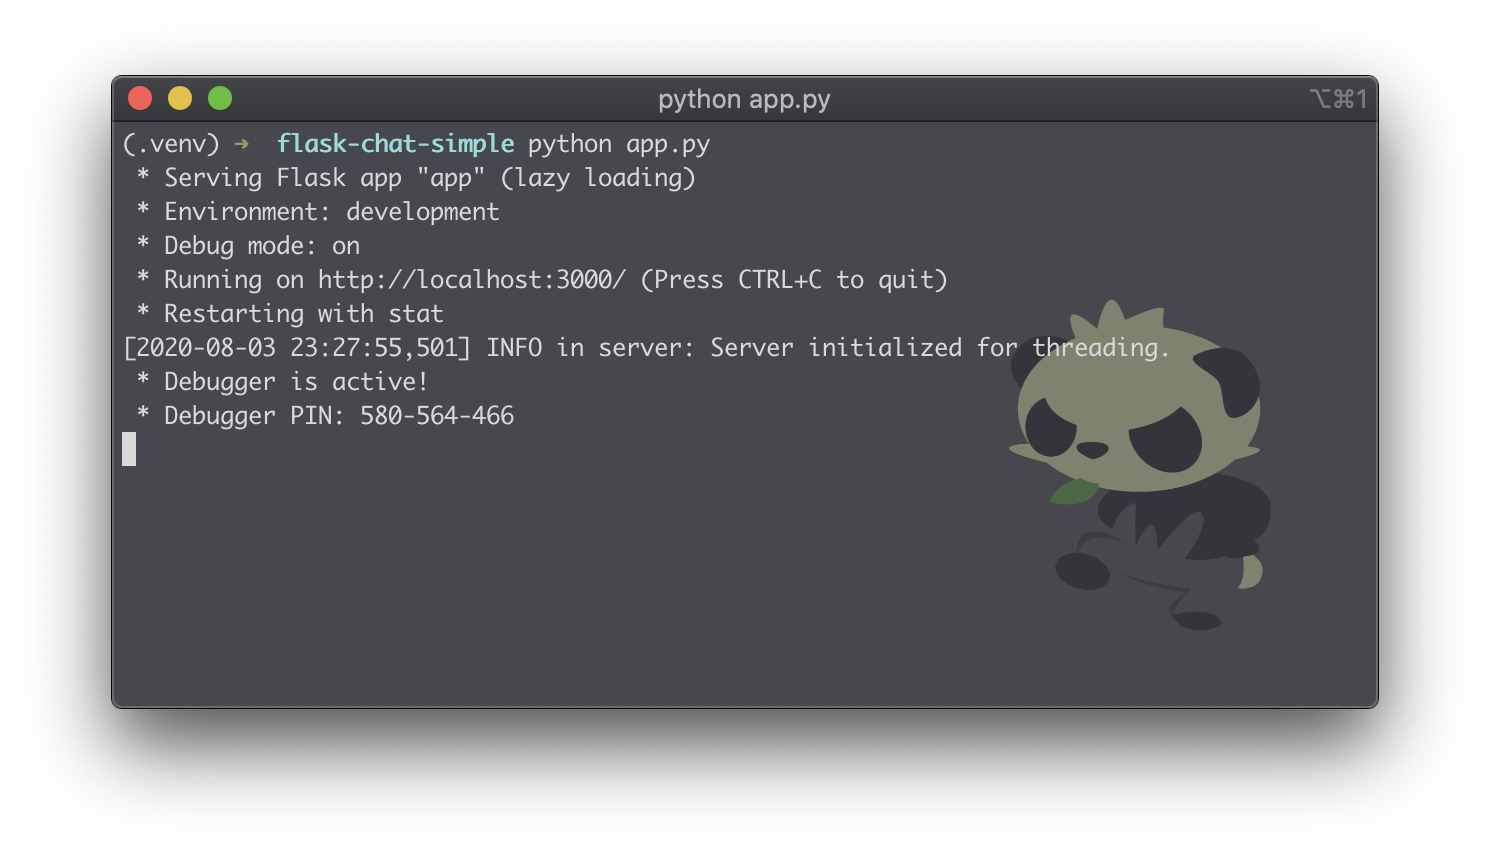
9. 실행 결과

마치며
이렇게 간단한게 Flask와 Socket.io로 채팅을 구현해보았다. 확실히 처음 만들어봤을 때에 비해서 라이브러리에 대한 이해도가 높아서인지 뚝딱 만들어낼 수 있었다. 지금은 웹 브라우저를 통해 채팅할 수 있도록 구현하였는데, 추후에 PyQt5를 이용하여 웹과 응용프로그램에서 채팅을 할 수 있도록 구현해봐야겠다.
'Back-end > Python' 카테고리의 다른 글
| [Python] Data Model 만들기 (2) - Data Type Field (0) | 2021.01.19 |
|---|---|
| [Python] Data Model 만들기 (1) - BaseField (0) | 2021.01.19 |
| [Tail] Python을 이용한 tail --follow 기능 구현 (1) | 2020.07.20 |
| [GraphQL] 무작정 시작하기 (5) - Connection Field를 이용한 Pagination (0) | 2020.05.04 |
| [PyQt5] 무작정 시작하기 (1) - 설치 및 실행 (0) | 2020.04.29 |